.png?width=300&height=65&name=GG%20Logo%20Main%20Navy%20(1).png)
Why Use User Groups?
The User Groups feature allows you to organize users into specific categories, such as by department, area of work, or any other criteria that suits your organization.
You can also assign certain users as User Group Administrators. These administrators have management access to their assigned user group, but they cannot edit, view, or manage other user groups or their associated information.
How to Create User Groups
-
From the Admin Panel, open the "User Groups" page.
- Click "+ Add User Group" in the top-right corner.
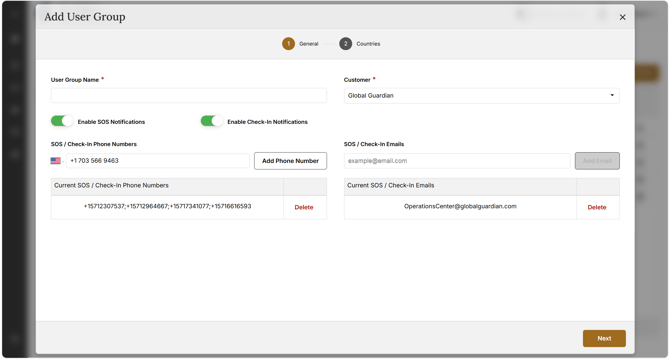
- Complete the required fields, "User Group Name" and "Customer," and click "Next."
- If relevant, select a country associated with the User Group.
- Click "Save."
Once saved, the User Group appears in the table of existing groups.

To edit or delete a User Group:
In the User Groups page of the Admin Panel, scroll through the list or use the search bar to find the desired User Group. Click the pencil icon to open the User Group details, where you can make and save any changes. To remove a User Group, click the trash icon to delete it from the platform.
Tip: Assign certain users as User Group Administrators to give them administrator access over their user group. Note that they cannot edit other user groups or view their information.
Importing Users to a User Group
-
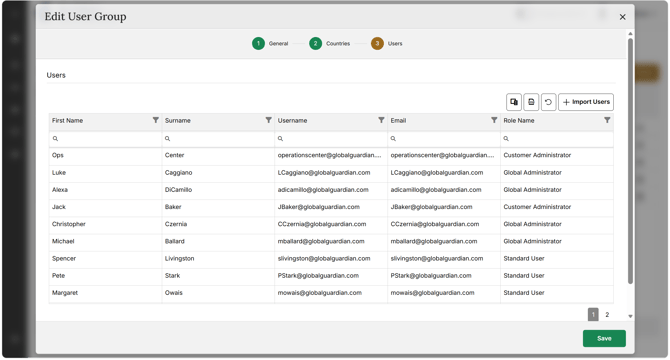
Click the pencil icon next to a User Group.

-
Click "Users" at the top, then click "Import Users."
-
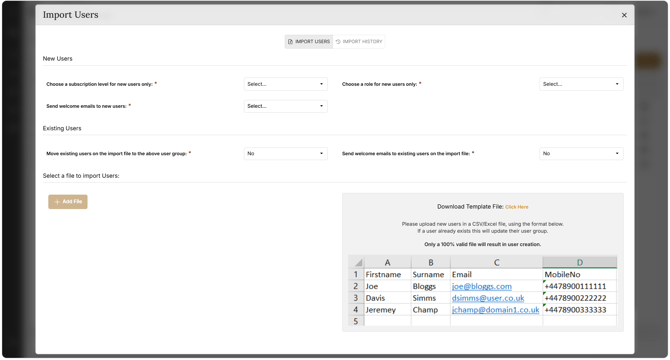
Download the template file and complete the required columns.
-
Click "Add File" to import the spreadsheet, and follow the prompts at the top of the view.