.png?width=300&height=65&name=GG%20Logo%20Main%20Navy%20(1).png)
In the Admin Panel, open the Reports dropdown, select "Reports," and click "Create." The window will update to the report wizard, which will take you step by step through the various stages to create your own report.
It is possible to create various kinds of reports, including:
- Intelligence Alerts
- Itineraries - Analytics
- Itineraries – By Segment
- Itineraries - By Trip
- Itineraries - Flight Passenger Numbers
- Locations
- Processed Reservations
- Processed Reservations – Numbers by Source
- Sent Messages – Emails Notifications
- Sent Messages – SMS
- TMC Audit - Invalid Emails
- TMC Audit - Volumes
- Tracking and Check Ins
- User Logins
- User Positions
- Users
- Users on the Ground
Only users with the role permissions of Customer Administrator or Customer Analyst can access the Reporting Module tool in the platform, and create or customize their own reports.
Select one of these types from the drop-down menu, then click "Next."
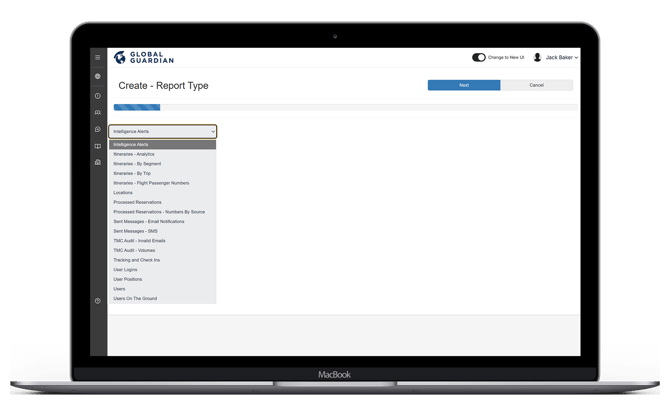
The report wizard will guide you through creating your report step by step. The administrator can select the various fields available for the report type.
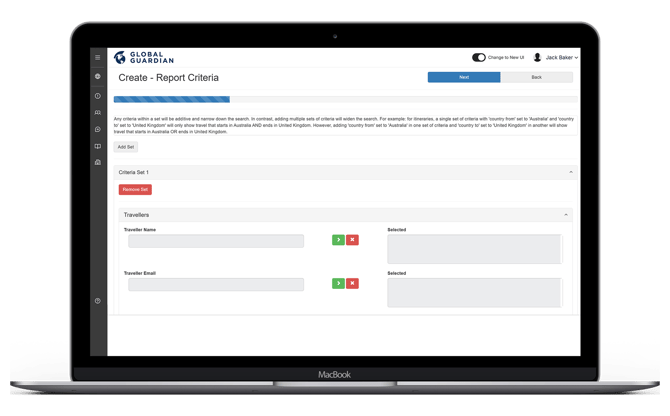
For example, if creating a report focusing on itineraries, you can select criteria according to traveler information, threat levels of arrival or departure locations, and define a date range for the data you would like to capture.
To add any criteria to the report, select the option and click the green arrow to add it, or the red cross to remove it.
Once all desired fields are selected, click “Next.” Then select the options for how you would like the report to be laid out. Select the field names provided in the selection box and add them by clicking the green arrow, or remove them by clicking the red arrow. It is also possible to reorder the columns by selecting a field and clicking the blue arrows up or down.
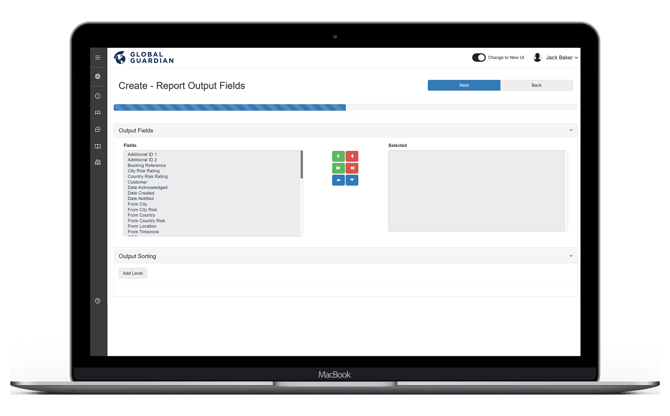
Arrange and sort the report results in the Output Sorting window by selecting a field and choosing whether to arrange it in ascending or descending order. Then, click “Next."
The next step is to name the custom report by entering a name in the text field provided.
There are also options to share the report with other platform administrators by selecting:
- Share with other Customer Admins in the company
- Add to the favorites as a default
Lastly, there are options to either Save, Save and Add/Edit Schedule, or Save and Run the report.
Clicking “Save" will provide a summary page of results for the created report. Here, you can edit, delete, or create a schedule to run the report regularly when needed.
Clicking “Save and Run” will run the report and display the results on screen. There is also an option to download the report as a .csv file.
Clicking “Save and Add/Edit Schedule” will open the page to create a schedule for the report.