.png?width=300&height=65&name=GG%20Logo%20Main%20Navy%20(1).png)
Check-In Schedules allow administrators to automatically remind users to check in using the mobile app at specified times and intervals. Schedules can be tailored using date ranges, time zones, recurrence patterns, and location-based conditions, ensuring users remain supported and accounted for while traveling or on the move.
Users can be enrolled in a schedule based on specific criteria, including country, geofence, or whether they are inside or outside a defined location. Administrators can assign schedules to all users, specific users, or user groups.
If a user misses a scheduled check-in, escalation notifications can be sent to designated administrators, helping organizations maintain compliance, monitor user wellbeing, and respond promptly when support may be required.
Creating a Check In Schedule
To create a new Check In Schedule:
- Navigate to the Administration Panel.
- Under Travel and Tracking, select "Check-In Schedules."
- Click "Create New Schedule."
The setup wizard will guide you through the following steps.
Step 1: General Information
- Enter a Schedule Title.
- Select a Customer
- Optionally, provide a Description.
- Click "Next."
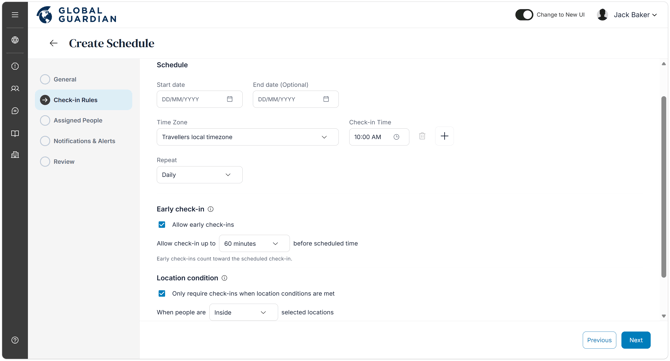
Step 2: Configure Check-In Rules:
Define when and where users will be required to check in. Configure the following settings:
- Start Date
- End Date (optional)
- Time Zone
- Use a specific time zone, or
- Automatically use each user's local time zone
- Check-In Time
- Configure one or multiple daily check in times
- Repeat Schedule
- Daily
- Weekly
- Custom recurrence
- Early Check In
- Allow users to check in before the scheduled time
- Specify the permitted early check in window (for example, up to 60 minutes early)
- Location Conditions
- Apply the schedule based on a specific country or geofence
- Specify whether users must be inside or outside the selected location
Once complete, click "Next."
Step 3: Assign Users
Choose which users will be enrolled in the Check In Schedule.
You can assign the schedule to:
- All users
- Specific users
- One or more user groups
After selecting the required users, click "Next."
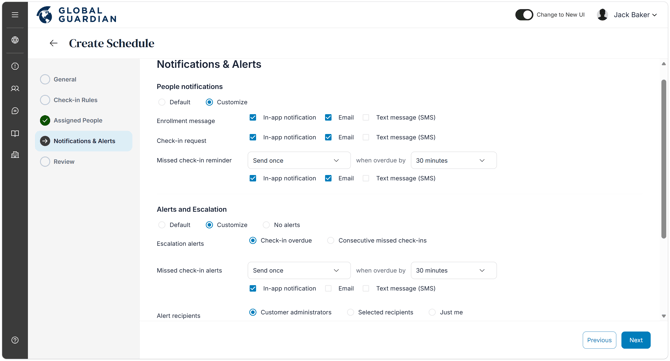
Step 4: Configure Notifications
Configure how users and administrators will be notified.
People Notifications are sent to users enrolled in the schedule and can include:
- Enrollment confirmation
- Scheduled check in requests
- Missed check in reminders
By default, notifications are sent via:
- App notification
Where available, notifications can also be sent by:
- SMS
Alerts and Escalations notify administrators when user action is required.
Examples include:
- A scheduled check in becomes overdue
- A user misses consecutive check ins
You can choose to send these notifications to:
- Selected alert recipients
- All administrators
Once configured, click "Next."
Step 5: Review and Save
Review all schedule settings before saving.
You can:
- Edit any section if changes are required
- Confirm the configuration
Click "Save" to create the Check-In Schedule.
Managing Check-In Schedules
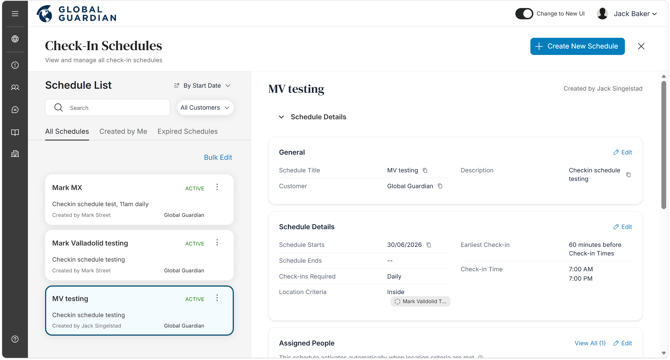
All Check-In Schedules can be managed from the Check-In Schedules page within the Administration Panel.
Administrators can:
- View all active schedules
- Monitor associated check in activity
- Identify users who have:
- Successfully completed scheduled check ins
- Missed a scheduled check in
- Quickly edit an existing schedule
- Delete a schedule when it is no longer required
Regularly reviewing check in activity helps ensure users remain compliant with scheduled check ins while providing administrators with greater visibility into traveler safety and wellbeing.