.png?width=300&height=65&name=GG%20Logo%20Main%20Navy%20(1).png)
In the Admin Panel, open the Reports dropdown, and select "Reports." Click "Create" and select an itinerary-based report from the drop-down.
When building an itinerary-based report and applying a custom date range, it is important to ensure this has been applied correctly in order to capture the correct data in the report output.
There are some easy options to start with by selecting from the drop-down:
- All Future
- All Past
- Custom Dates
- Custom Relative Days
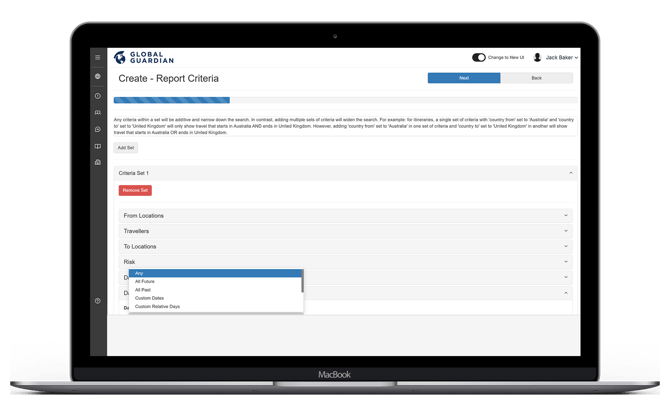
To apply a custom date range, the following example may be of some assistance.
Example
You need to build a report with a custom date range from 1–14 March 2021. This means the date range needs to be set to include all itineraries which meet the criteria for:
-
All already in country
-
All who arrive within the date range
-
All who depart within the date range
-
All who arrive and depart within the date range
You will need to select a start date and an end date using the filter options under the "Trip Information" drop-down.
For this example you will need to set the following:
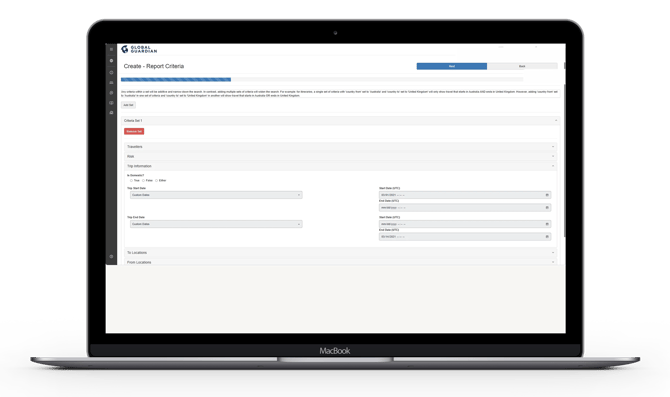
- For the Start Date, set this to the end of the date range needed, which is 03/14/2021. This will ensure you capture all who are due to arrive within the date range up to 14 March.
- For the End Date, set this to the start of the date range needed, which is 03/01/2021. This will ensure you capture all who may already be in-country and are due to depart after 1 March.
Once the date range is set, along with any other criteria needed, click "Next" to proceed to the next step creating the report.